All Posts By

jcsupport

How Best To Clean Your Dog’s Teeth

By Dogs No Comments

Keep your dog’s teeth healthy with regular dental checkups

Read Time: 4 minutes

Does your pet have bad breath? It might be a sign of hidden dental problems or the need for a dental cleaning performed by a veterinary professional. To keep your pet’s teeth in check between annual exams you can use dog-specific toothbrushes and toothpaste, dental treats and bones, chew toys, and water additives. But, even when using these extra measures, prepare to have your dog’s teeth professionally cleaned. You’ll likely need to have your dog’s teeth cleaned more often if they are a small dog breed due to crowding in the mouth or if they are a senior canine.

Techniques for Keeping Your Dog’s Mouth Clean

Fingertoothbrush for dogs

The main techniques for keeping your dog’s mouth clean are by brushing, using dental treats, and having your veterinarian perform dental cleanings as needed. There are also a handful of supplemental teeth cleaning options for maintaining your dog’s oral hygiene. These options include tooth wipes, chew toys, dental bones, and water additives.

Preventative dental care for dogs costs a fraction of the price tag on treating tooth-related diseases. This realization has shown a spike in dental care-related spending by pet owners. And with 8 in 10 dogs showing signs of oral disease by their third birthday, it makes sense to put in the upfront effort to maintain your dog’s oral health.

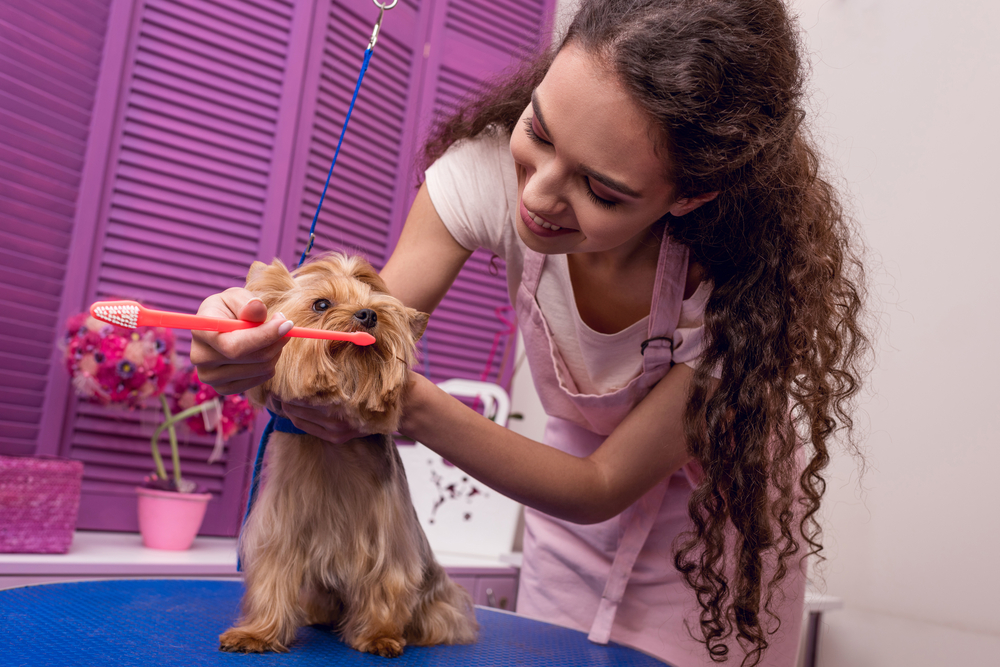
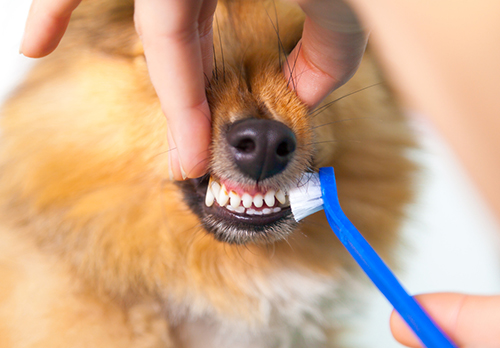
Brushing Your Dog’s Teeth

Getting ready to brush dog's teeth

While 76% of pet owners agree that oral hygiene is important for overall health in their canine companions, only 10% brush their dog’s teeth at least once weekly. But brushing your dog’s teeth is the most effective way for you to fend off plaque before it turns into tartar, a process that takes 24 to 48 hours.

How to Brush Your Dog’s Teeth

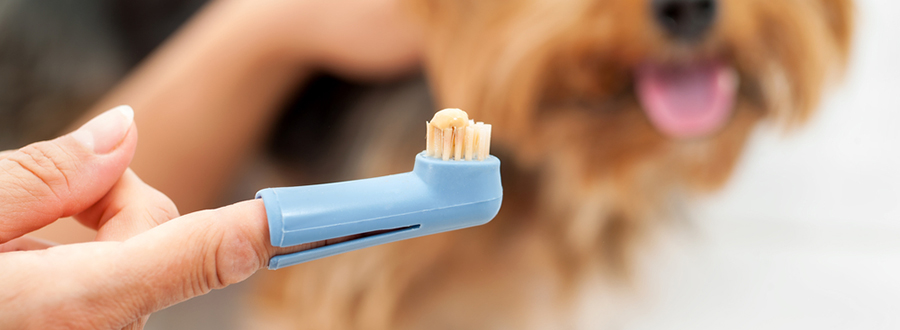
You’ll want to use a dog-specific toothbrush. If you can’t locate one made for dogs, try a soft-bristled child’s toothbrush or a finger toothbrush. You’ll pair this with dog-specific toothpaste. Never use toothpaste meant for people. Baking soda and salt should also never be used as dog toothpaste-supplements as they can be harmful to your dog. Plus, your dog will be more receptive to dog toothpaste which is usually flavored to taste like poultry or another dog-approved taste.

#1

Position yourself non-threateningly

To begin the toothbrushing process, kneel or sit by your dog’s head. You don’t want to crowd or restrain your pet. This will only make them fearful and associate toothbrushing with being held down.

#2

Start by getting your dog used to light pressure on their teeth and gums

If you’ve never brushed your dog’s teeth or handled their mouth, start by rubbing your finger along their teeth and gum line. This is to help your dog become familiar with have their teeth touched. Don’t be surprised if your pup isn’t a huge fan of this. If they are especially resistant, try slowly warming them up to have you touch their teeth over multiple brushing sessions before ever using the toothbrush.

#3

Allow your dog to taste the dog toothpaste

Once your dog has accepted having their teeth touched by you, let them test out the taste of the dog toothpaste. If they aren’t a fan of the type you’ve picked out you can test out different flavors and brands until you find one they enjoy.

#4

Begin brushing, being careful not to apply too much pressure

Brushing dogs teeth

Now it’s time to begin brushing. Gently place the toothbrush at a 45-degree angle of the gumline. This will better clear away plaque than placing the toothbrush flat against the tooth. Use gentle circular motions across all top and bottom teeth. Throughout the process, be gentle, reassuring, and always end with a treat and praise.

Tip

Try to brush their teeth every few days or once a week.

Note: Some bleeding may occur during this process. Monitor the status of bleeding to ensure it is not severe. While minor bleeding is normal, severe bleeding could be a sign your dog is developing periodontitis. If major bleeding occurs contact your pet’s vet as soon as possible.

Need your dog’s teeth cleaned?

Contact us

Toothwipes as Alternatives to Toothbrushes

If your dog says no way to toothbrushes, you might be able to get away with using toothwipes. These premoistened wipes can be used daily to wipe the surface of the teeth. Toothwipes are textured specifically for use on dog’s teeth to clean but not damage gums. They are convenient and quick to use with no need for rinsing.

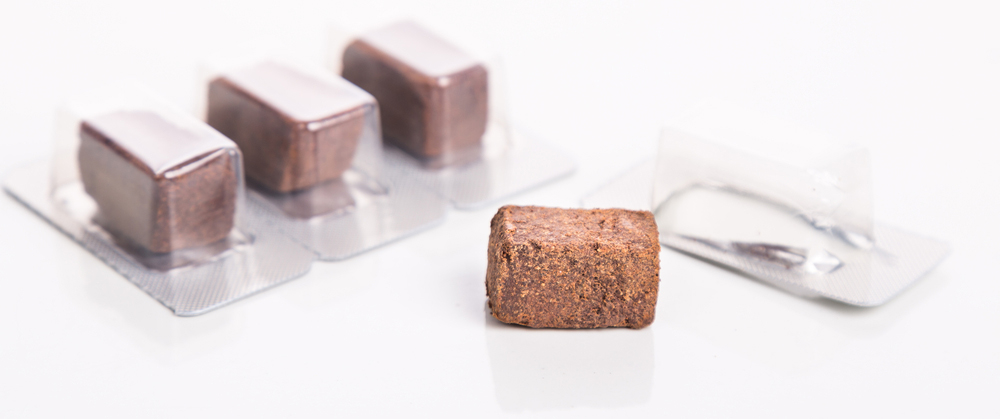
Offering Dental Treats to Your Dog

Dental treats for dogs

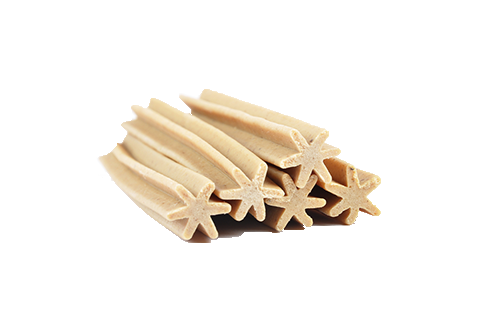
Dental treats are lining pet store shelves and they can be great, convenient ways to slip in an extra oral health-conscious decision into your dog’s everyday life. Some dog dental treats on the market today can reduce your dog’s plaque by up to 70%. This is achieved by larger diameter treats with a coating called polyphosphate. The Veterinary Oral Health Council (VOHL) gives its seal of approval on products able to reduce plaque by 10% to 20% depending on the specific uses. A full list of products that received their seal of approval can be found here.

But even with a better doggy smile in order, you’ll want to limit the number of dental treats your dog receives. You don’t want to trade out dental problems for weight problems.

Chew Toys, Bones, and Diets for Dental Cleaning

If you’re trying to watch your dog’s weight, there are other ‘fun’ ways to practice oral hygiene with your pup.

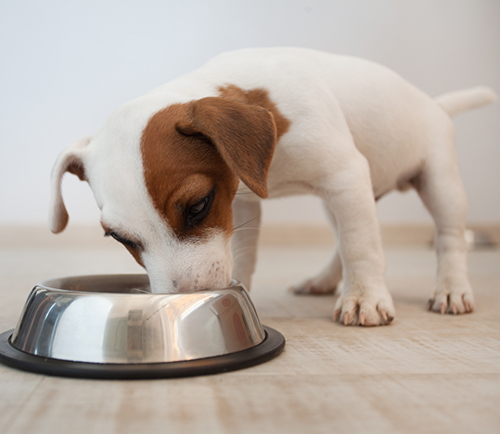
Chew toys and bones give your dog something to gnaw on that will work at the buildup on his teeth and in the crevices of his teeth. This helps to kick plaque to the curb before it hardens and becomes tartar. You can also opt for a dental-specific diet to replace his current kibble. But check with your vet before you make the switch. They’ll be able to guide you to the best brand for real results.

While dental treats, chew toys, bones, and dental health-specific diets can all help to improve your dog’s oral hygiene, it can’t replace brushing and professional cleaning. These products can clean the surface of your dog’s mouth, but they aren’t able to clean under the gumline. This is where plaque really gets established and starts wreaking havoc. So while these dental hygiene options are beneficial, they shouldn’t be the only measure you take to ensure your dog has a healthy mouth.

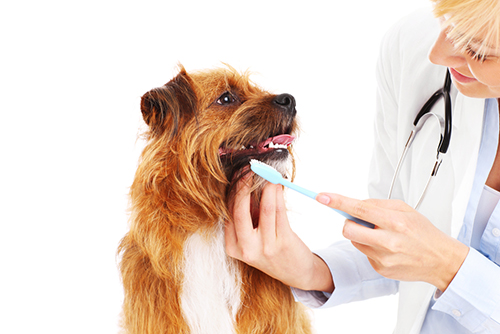
Cleanings by Your Veterinarian

Professional cleaning by vet professional

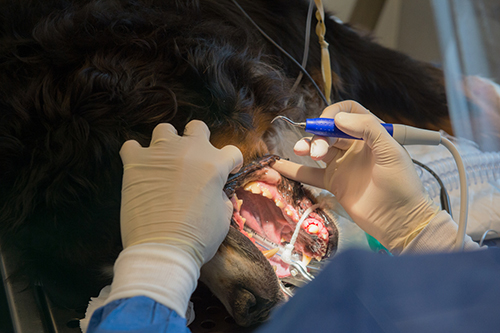
While you can practice every other method of canine dental hygiene, professional dental cleanings shouldn’t be skipped out on. Your veterinarian and their trained staff will remove tartar and make any necessary teeth extractions to get your dog’s mouth back to tip-top condition.

You should prepare for professional dental cleaning once a year. But speak with your vet to develop the best plan for your pup. Some dogs may be able to wait longer between cleaning while some may need them more frequently.

How Often Should Your Dog’s Teeth Be Cleaned?

Professional cleanings once per year is recommended by most veterinary professionals. However, your veterinarian will assess your dog and determine the best treatment plan for your pet.

Your pet may need more frequent cleanings if they are older, have advanced dental problems, or are a small dog breed. Small dog breeds are notorious for their bad teeth. This is caused by their mouths being smaller and becoming overcrowded. Their overcrowded teeth are then more susceptible to periodontal disease.

What Does a Healthy Dog Mouth Look Like?

If you take a peek into your dog’s mouth you can potentially spot developing problems before they worsen. Healthy dog gums are pink or mottled. Their gums shouldn’t be red, swollen, or oozing. Also keep an eye out for pale pink, white, blue and purple gums. Basically, if they’re not a healthy pink, it’s time to call your vet.

While your dog’s breath will never revert to its puppy breath stage, you can still spot a rising oral health problem. If your dog’s breath is particularly pungent they may have a dental disease.

Healthy dog mouths will not have any broken teeth or obvious, significant plaque buildup around the gumline.

Common Dental Problems to Watch For

Plaque buildup on dog tooth

Knowing what to look for and what can happen to a dog with unmaintained oral hygiene can help dog owners stay on top of keeping their dog’s mouth properly managed. Here are the most common canine dental problems to watch out for.

Cysts

Sometimes lumps and bumps will form in your dog’s mouth. While these might be nothing to worry about, you’d rather be safe than sorry. Have your vet check to see if the newly-formed bump is a tumor or cyst.

If it’s a cyst, your vet may need to drain it. If it’s a tumor, your vet will likely suggest it be biopsied to determine whether it is cancerous or not.

What it looks like: Raised lumps on your dog’s gums. Will likely be one solitary lump.

Halitosis

Halitosis, otherwise known as bad breath, is caused by bacterial buildup in the mouth. While you should start brushing your dog’s teeth more regularly, it doesn’t hurt to have your dog examined by their vet. Halitosis sometimes points to an underlying infection or kidney disease.

What it looks like: You’ll smell it rather than see it. It will be more intense than normal ‘doggy breath’.
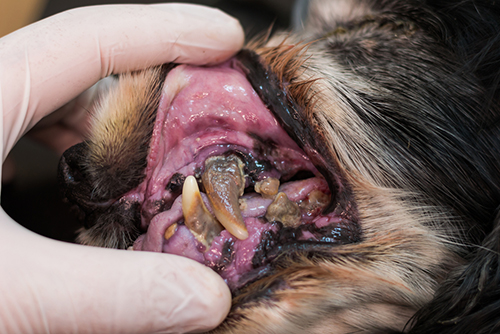
Plaque

Plaque on dog teeth with mouth infection

Plaque is the dark brown or yellowish buildup on your dog’s teeth. It will likely be concentrated around the gumline. Plaque will turn into tartar within 24 to 48 hours. At which point you won’t be able to simply brush it away.

If you notice an increase in plaque or tartar buildup on your dog’s teeth, it may be time for a professional cleaning. Contact your veterinarian for an exam to determine if and when your dog will need to be scheduled for a dental exam.

What it looks like: Dark brown or yellow buildup on dog’s teeth, concentrated around the gumline.

Proliferating Gum Disease

Proliferating gum disease occurs when the gums begin to grow over the teeth. Dogs with proliferating gum disease are more susceptible to developing infections.

What it looks like: Gums growing over teeth, more common in boxers and bull terriers.

Gingivitis

Dog mouth with gingivitis

Dogs develop gingivitis just like people. Luckily, you can reverse this dental condition with a change in your pet’s oral hygiene habits. Begin brushing your dog’s teeth more often and making other small changes in favor of healthy teeth. Your veterinarian can help guide you in making the best decisions for your dog as you manage this dental condition.

What it looks like: Irritated gums and an excess of plaque.

Periodontal Disease

Dogs can begin to show signs of periodontitis as early as three years old. Given it’s the most common dental condition in dogs, you’ll want to take special precautionary measures to prevent your dog from developing it.

Dogs with periodontal disease will experience pain, loosening teeth, irritated and swollen gums, and in severe cases, nasal discharge.

Book an appointment with your veterinarian at the first sign of your dog developing periodontal disease. Your veterinarian will be able to develop a treatment plan to help manage your dog’s condition.

What it looks like: Yellowing or brown teeth, loss of appetite or difficulty eating, and irritated gums are all signs of periodontal disease.

Signs You Need to Take Your Dog to the Vet

If your pet is up-to-date on his exams but is exhibiting any of the following symptoms, contact your vet to have his teeth checked:

  • Bad or worsening breath
  • Buildup of plaque along the gumline
  • Swollen and bleeding gums
  • Loss of appetite
  • Excessive drooling
  • Pawing or scratching at their mouths consistently
  • Unexplained lumps or growths on the gums
  • Broken and discolored teeth

You want to tackle dental problems before they progress. By contacting your veterinarian as soon as you become aware of your dog’s symptoms you are more likely to resolve the problem before it becomes a major problem for your dog’s comfort and your wallet.

If you haven’t had your pup’s teeth checked in the past year or longer, schedule an appointment to get them on the path to lifelong oral health.

Schedule Your Pet’s Dental Cleaning

Our team of veterinary experts can help restore your pet’s oral health.

Contact us

Does a pet microchip have a GPS in it?

By Dogs No Comments

Pet GPS is a different technology from a microchip

Read Time: 2 minutes

Pet microchips do not have GPS technology. Instead, they use Radio-frequency identification (RFID) technology that is able to be scanned for information, like the pet owner’s contact information. This means that microchips can’t give your pet’s location if they get lost, but can lead to their safe return when found.


What is a Microchip?

Microchipping your pet is one of the most effective ways to be reunited with a lost or stolen pet.

Vet microchipping a dog

Very Small & Placed Under Your Pet’s Skin

A microchip is about the size of a grain of rice and is placed under your pet’s skin, usually between the shoulder blades. It is placed in a sterile applicator and injected in the loose skin, causing no more harm to your pet than you normally feel with having blood drawn.

Pet microchip next to a grain of rice

Helps Your Lost Pet Find You

While a microchip may not exactly help you find your lost pet, it works the other way around. If your pet is taken to a vet or animal hospital, the information on the microchip will allow them to reach out to your and reunite you both.

More Information than a Collar

While a collar is useful in reuniting you with your furry friend, it provides significantly less information than a microchip. It can also be easily taken off by your pet, another animal, or a person. That’s why we recommend equipping your pet with both a tagged collar and a microchip.

How Does a Microchip Work?

If your pet is lost or stolen and ends up at a vet or animal shelter, the first thing that they’ll do is check for a collar and microchip.

A scanner will be used on your pet to check for the microchip. It is placed outside of the skin near where the microchip was implanted. The chip will then use radio frequency identification (RFID) technology to transmit your pet’s registration number.

As long as you have registered your pet’s microchip, the vet or animal shelter will be able to see your contact information and reach out about the whereabouts of your pet.

Vet checking for a cat's microchip

How to Register Your Pet’s Microchip

Your pet’s microchip is useless without up-to-date information in a registry. As soon as you get your pet microchipped, register them at any and all registrations that you can find. Some popular ones are:

It’s vitally important to update your information in the registries anytime that it changes. If you move, get a new phone number, change your last name for a marriage, or any other cause of information changing, remember to update your information so that your pet can get back to you safely.

Are There GPS Trackers for Pets?

While microchips don’t give your pet’s location, GPS options do exist. However, they’re extremely different from microchips. GPS devices for your pet:

  • Are worn externally, usually on a collar
  • Are large and heavy compared to microchips making them difficult for smaller animals
  • Cost upwards of a couple hundred dollars
  • Typically require a monthly subscription fee
  • Have a limited range, typically of a couple miles
  • Usually last a couple of days until the batteries need to be charged again

If your pet gets lost extremely often, a GPS tracker may work for you, but be aware of the ongoing cost and maintenance that they typically require.

Read more about how we can help with microchipping your pet.

Examples of GPS Trackers for Pets

Should You Microchip Your Pet?

By Dogs No Comments

A microchip can help find a lost pet

Read Time: 3 minutes
Picture this: Your pet manages to get out of your home, they slip out of their collar with your phone number and name, and completely disappear. It’s a scary situation to find yourself in as a pet owner. But with one small change, you can increase the odds of bringing your pet home safely. In fact, over 52% of dogs are returned to their owners thanks to a microchip.

Are Microchips Safe for Pets?

Microchips are completely safe for pets and have become standard practice. Many pet owners request microchipping when they bring their pet in for a spay or neuter. This procedure is performed in the clinic using a sterile, pre-loaded syringe.

The standard microchip placement for dogs and cats is behind the neck and between the shoulder blades. It’s safe, sterile, and quick. Plus, one microchip lasts a lifetime so there’s no need to worry about boosters.

What Animals Can Be Microchipped?

Dogs and cats should be microchipped regardless of whether they reside mostly outside or inside your home. Rabbits, horses, ferrets, and even parrots can be microchipped, among plenty of other domestic pets.

While dogs and cats are the most common species to be microchipped, you can ask your vet about microchipping any species of pet you might own. You’d be surprised by the types of animals who are being microchipped.

How is the Microchip Inserted?

The microchip is inserted using a sterile, pre-loaded syringe. The injection site for dogs and cats is most commonly between the shoulder blades.
Holding up a microchip syringe
If your fur baby was adopted from a shelter or rescue, there’s a strong chance he or she has already been microchipped. Standard practice for shelters is to microchip upon intake and examination of all rescued animals.

Benefits of Microchipping Dogs and Cats

But why should you microchip your pet? Pet microchips come with a number of benefits. While these benefits are only capitalized on in emergency situations if your pet becomes separated from you, it’s important to prepare for a situation where that’s the case. Better safe than separated permanently.

Let’s check out the benefits of microchipping your dog or cat:

  • Permanent identification if your pet wanders off and is found by an individual or shelter
  • Ability to reconnect with your pet after a natural disaster
  • Lifetime identification as microchips are permanent
  • Quicker reconnection with pets who may suffer from diseases requiring medication

How Do I Find My Pet Using Their Microchip?

You can’t track your pet’s location using a microchip but the person who finds your pet can use it to find you. When a pet is taken to a veterinary clinic, rescue, or shelter they will be scanned for a microchip.

If a registered microchip is located it will give an identification number used to pull up your pet’s profile. This profile will include your name and contact information.

Does My Pet Need a Collar and Tag If They’re Microchipped?

More identifying markers are not a bad thing. In order to scan a microchip, you need a microchip scanner. The average household does keep a microchip scanner in their junk drawer so it’s wise to have a more easily accessible identifying mark on your pet.

Double up with a collar and tag and a microchip to give your pet the best chances of reuniting with you.

Pet Microchipping Myths

Microchipping syringe and microchip for pets
There are always those who support and those who hate pet microchipping. Let’s debunk some common microchipping myths to stop the spread of false information.

Myth #1 – Indoor Cats Don’t Need Microchips

Indoor cats can get out of a house. With that in mind, it’s always wise to prepare for the worst. Cats have a low return-to-owner rate, but inserting a microchip ups their chances of making it home.

Your pet many never get lost. But, by preparing with a microchip, you can rest assured the odds of your pet making it home are greatly improved if they ever do get lost.

Myth #2 – Microchips Are Painful to Implant

Microchips are about as painful as having blood drawn. Many owners have their pet microchipped during their spay and neuter procedures while they are under anesthesia.

Myth #3 – Microchips Allow You to GPS Track Your Pet

Unfortunately, microchipping your pet doesn’t give you an automatic GPS tracker. If your pet is lost the shelter or individual you find them will have to scan their neck for a microchip. However, microchipping scanning is a standard practice now which means it’s unlikely your pet won’t have their microchip scanned once found.

If you’re dead set on finding a GPS tracker for your pet, there are a number of options on the market. These have a higher initial and maintenance cost than other pet identification methods.

Is Microchipping Your Pet Expensive?

owner hugging their pet
Microchipping costs generally fall below $75 for initial implantation. This is a one-time fee for the application of the microchip by the veterinarian.

Most veterinarians will scan for an existing microchip before inserting a new one. This is great if you’re unsure if your pet has been microchipped by previous owners or from the entity they were adopted from. It will also cut the cost of an unnecessary microchip and eliminate potential confusion of ID numbers if your pet is scanned for a microchip in the future.

Can My Pet’s Microchip Number Expire?

Your pet’s microchip number won’t expire. However, you’ll want to keep the pet’s listing up-to-date. Keep track of the registering agency where your pet’s profile is held and keep it updated after you move to a new home or get a new phone number.

It’s also wise to keep an eye on the terms of your chosen registry agency. Some are free, some require a one-time fee, and some require annual payments to keep updated.

How to Keep Your Pet’s Information Updated

Cat being scanned for microchip
If you move or update your phone number you’ll need to update your pet’s profile on the correct registry.

If you’re unsure where your pet is registered, enter the microchip number in the AAHA Universal Pet Microchip Lookup. This will direct you to the correct registry or manufacturer of the chip. Use the results of this lookup tool to track down the registry or manufacturer you can update your pet’s profile with.

Some common pet microchip registries include:

If you have questions or concerns about microchipping, or would like to schedule an appointment to have your pet microchipped, contact us.

What to Do When You Find a Lost Cat

By Cats No Comments

Help reunite a lost kitty with their family

Read Time: 5 minutes

Capture and Contain the Cat

If you’re able to do so safely, try to capture and contain the cat. If it’s a domestic cat that got out, it may be easier to capture than if it’s a stray. For a stray cat, you may need to contact the police or animal control.

Approach Cautiously

No matter how the cat is behaving, it’s important to approach it with caution. You never know when a sudden movement of yours could spook the cat or make it feel threatened. From a distance, it can be difficult to tell if it’s a feral cat, a stray, someone’s house cat that escaped, or an outdoor pet. It’s better to be safe than sorry!

Speak Gently and Bribe with Food

Speaking in a friendly, gentle voice can help put the cat at ease. If the cat is hiding in a small space and is difficult to reach, you can try using food to coax it out into the open.

Confine in a Cat Carrier

If you are able to successfully capture the cat on your own, place it in a cat carrier or some other sort of secure container that has air holes. If the cat is stray or feral, it may dislike being confined, so it’s important that the container is secure or it may escape.

Woman making a phone call on iPhone

Call Animal Control

If the cat is behaving aggressively, call the authorities. Animal control can more safely catch a cat that is aggressive or running away. The more information you can provide about its exact location or its appearance, the easier it will be for the authorities to capture and contain the cat.

It’s important to not risk your own safety in order to catch the cat.

Take the Cat to a Vet

Once you have captured the cat, take it to a vet for a check-up. The vet can tell you if there are any health issues that need to be addressed.

Contact the Owner

It’s essential to try to contact the owner, if there is one, as soon as possible. A family may be missing a vital furry family member. If you’re able to reunite them, you’d be doing a good deed that will make the family and cat very happy.

Check for ID Tags

First, check around the cat’s neck for a collar. If it’s a pet, especially an outdoor pet, there may be an ID tag with an owner’s contact information. If there is an ID tag, you can contact the owner immediately to return the pet. If you’re unable to reach the owner, even with their contact information, you can try calling back a few hours later and either hold on to the cat until then or take it to a shelter.

Cat being microchipped

Scan for a Microchip

If there is no ID tag, the next step is to get the cat scanned for a microchip. An animal shelter should be able to do the scan for you. You can either take the cat there yourself or call animal control or the police.

File a Found Report

If you’re not immediately able to get a hold of the owner of the cat, it’s important to file a report with the local animal shelter to inform them that you’ve found the cat. The owner may be contacting local shelters in an effort to find their pet. Especially if you’ve decided to hold onto the cat until you can get a hold of the owners, it’s important to leave a found report with your contact information so the owner can find you.

You can also make a listing on Facebook announcing that you’ve found the cat. There are specific pages dedicated to lost pets. If there’s one for your area, you can make an announcement online with a picture of the cat.

Take the Cat to an Animal Shelter

If you can’t get a hold of the owner or there is no ID tag on the cat, you should take the cat to the local animal shelter. The shelter can take care of the cat as well as scan for a microchip. Some animal shelters cannot take the cat to keep, however. Ask about this over the phone before you bring them in. The owner may stop by the shelter to look for their pet in the hopes that someone stopped by to trop it off or to file a found report.

Indoor cat looking at camera

What If the Cat Has No ID Tags?

If the cat has no ID tags, finding the owner is more difficult. If the cat’s behavior suggests that it is a pet, it’s important to make the effort to try to find the owner.

Take the Cat to an Animal Shelter

If you take the cat to an animal shelter, they should be able to scan for a microchip. If the cat has no microchip, the shelter may still have received a report from the owner about a missing cat and may be able to help find the owner. If no owner can be found, a shelter can look after the cat until they can get it adopted.

Post a Picture in the Shelter’s Database

Filing a report with the shelter and posting a picture of the found cat will help the owner find their cat. This will increase the chances that the cat is reunited with its rightful owner and family.

Post Fliers

You can also post fliers around your neighborhood and where you found the cat with pictures and your contact information. Also, try posting a found cat announcement online. You never know who may know the owner.

Look for Lost Cat Fliers

Check around your neighborhood, especially where you found the cat, for fliers. The owner may have posted fliers with a picture and their own contact information (and possibly a reward!).

Check Online

Look online to see if anyone has posted a notice that they’ve lost their cat. Social media platforms like Facebook may have pages where people can post lost or found reports. Craigslist can also be a good resource. The Internet has made it a lot easier to reunite lost pets with their owners and many strangers online may be willing to help.

How Can I Tell if the Cat Is Just an Outdoor Cat?

Some cats are outdoor cats. Their owners purposely let them roam and they return home regularly for food and to sleep. But how can you tell if the cat you found is an outdoor cat, if it’s a stray or feral, or if it’s an indoor cat that’s gotten out?

Look for ID Tags

First, check for ID tags. If the cat has identification, that rules out stray or feral.

Check the Cat’s Appearance

Look at the cat’s appearance. Any outdoor cat that regularly returns home would be clean and well-groomed. Feral cats are actually the same way – they know how to fend for and groom themselves and will look nicer. An indoor cat that has escaped may be thinner than normal or may look scruffy. Indoor cats aren’t used to hunting or otherwise fending for themselves.

Look for Nervous Behaviors

Is the cat skittish and nervous? If it’s an indoor cat that got out, it may be scared and anxious. Feral cats tend to be nervous around people and may run or be aggressive. Outdoor cats are often very friendly and may come up to you for petting. A stray cat could be either friendly or standoffish, depending on the cat’s personality.

All cats do tend to be wary of people, so you should observe the cat over time to see how it behaves. Owned cats do tend to be more trusting of people. Indoor cats that get outside may follow you anxiously or meow at you as if they need something from you.

Call the Owner

If you find a cat with an ID tag and you’re unsure if it’s supposed to be outside or not, call the owner. They can verify for you whether their cat is meant to be outside. If it’s an outdoor cat, then no harm was done and you’ll know for the future that that particular cat is supposed to be there. If it’s an indoor cat, then you’ve just helped reunited it with the owner.

Ask Around

The people who live in that area may know more about the cats that are there. Neighbors may recognize the cat and be able to tell you if it’s supposed to be outside or not, or if it’s stray.

What If There Is No Owner?

There may be no owner. The cat may have been abandoned or it may be a stray. If you have done your due diligence in trying to locate the owner and were unsuccessful, you have two options: keep the cat yourself or rehome the cat.

Keep the Cat

If you cannot find the owner and have forged a connection with the cat you found, you may decide to keep the cat. You’ll want to make sure that you can provide a good home for it and take care of it properly, though.

Take the Cat to a Vet

If you’re keeping the cat, the first step is to take it to the vet. You can establish a relationship with a vet early in your pet ownership and make sure that the cat is healthy. You can also get the cat spayed or neutered as well as get any shots or medication it might need.

Buy Food and Supplies

Next, stop by a pet store for food and supplies. If you’re a first-time cat owner, you’ll need a bed, food, toys, litter, a litter box, and treats. The employees can help you find what you need. Even if you already have cats or other pets, you may want to have some supplies specifically for the new cat.

Learn to Care for the Cat

If you’re new to owning a cat, it’s essential to do your research. Look online, ask your vet or the pet store employees for advice.

Find the Cat a Home

If you’re unable to take in the cat yourself, you’ll need to find it a new home.

Take the Cat to a Shelter

One option is to take the cat to a shelter. They may have more resources to care for the cat and to find it a new home. However, shelters can be over-crowded and some are unfortunately forced to put down animals that they are unable to rehome.

Rehome the Cat

Alternatively, you can try to find a new home for the cat yourself. Post fliers and ask around. You can also post online to find a new home for the cat.

Tiny puppy being held

How Much to Feed a Kitten or Puppy

By Cats, Dogs No Comments

Help your pet grow with the right amount of food

Read Time: 6 minutes
What you feed your puppy matters. If you feed him or her right during puppyhood, you’re setting your dog up for a life that’s both healthy and long. But it’s not just a matter of choosing the right foods. It’s also a matter of how much you should feed your puppy.

Knowing exactly how much depends on a lot of factors, including your puppy’s age and what breed it is. Larger breeds are going to need a lot more food than smaller ones.

Are you feeding a puppy or a kitten? Select the option below to jump to that section.

PuppyKitten

Feeding a Puppy

Puppies need special puppy food. Puppies are growing rapidly and need special nutrition that adult dogs don’t. But how much puppy food should you give your dog and when should you switch to adult food?

How Much to Feed a Puppy

How much you should feed your puppy depends on its age and its breed. Most feeding guides will measure how much you should feed your puppy based on how much it will weigh when it becomes an adult. For example, a puppy that will be 3-12 pounds when it reaches adulthood should be fed ½ to 1 cups of food when it’s 1½ to 3 months old.

Below are general recommendations for how much a puppy should eat based on its adult weight. However, you should still consult the instructions on the package before feeding your puppy. Different food, especially that specifically aimed at large or small breeds, may have different recommendations.

1 1/2 to 3 Months

Adult weight Cups
3 to 12 pounds 1/2 to 1
13 to 20 pounds 1/2 to 1 1/4
21 to 50 pounds 1/2 to 1 1/2
51 to 75 pounds 5/8 2 1/3
75 to 100 pounds 1 to 2 2/3
100+ pounds 2 2/3 + 1/3 cup per ten pounds over 100

4 to 5 Months

Adult weight Cups
3 to 12 pounds 2/3 to 1 1/3
13 to 20 pounds 1 1/8 to 2
21 to 50 pounds 1 1/2 to 2 3/4
51 to 75 pounds 1 1/2 to 4
75 to 100 pounds 2 7/8 to 3 3/4
100+ pounds 3 3/4 + 1/3 cup per ten pounds over 100

6 to 8 Months

Adult weight Cups
3 to 12 pounds 1/2 to 1 1/2
13 to 20 pounds 3/4 to 1 1/3
21 to 50 pounds 1 1/8 to 2 1/3
51 to 75 pounds 1 1/2 to 3 3/4
75 to 100 pounds 2 7/8 to 6 1/3
100+ pounds 6 1/3 + 1/3 cup per ten pounds over 100

9 to 11 Months

Adult weight Cups
3 to 12 pounds Same as for an adult
13 to 20 pounds 1 to 1 1/2
21 to 50 pounds 2 to 3
51 to 75 pounds 2 1/2 to 4 3/4
75 to 100 pounds 3 7/8 to 7
100+ pounds 7 + 1/3 cup per ten pounds over 100

1 to 2 Years

Adult weight Cups
3 to 12 pounds Same as for an adult
13 to 20 pounds Same as for an adult
21 to 50 pounds 2 to 4 1/4
51 to 75 pounds 2 5/8 to 6 1/4
75 to 100 pounds 5 5/8 to 11
100+ pounds 11 + 1/3 cup per ten pounds over 100

When to Feed a Puppy

When to feed your puppy depends on your schedule. If you divide the total amount of food your puppy should be eating each day into regular meals, then you can make up a meal schedule. It’s important to be consistent, so many dog owners feed their pets when they themselves eat – at breakfast, lunch, and dinner.

To decrease the risk of accidents, make sure to feed your puppy earlier in the evenings so it has time to digest.

What to Feed a Puppy

Feeding your puppy the right food is just as important as how much you feed it. Special puppy food will provide your puppy with all of the right nutrients it needs to grow healthily. Be sure to check if there’s a specific type of food for the size or breed of your dog.

Dry or Wet Food

So long as your puppy is getting all of the nutrients it needs, it doesn’t matter whether you feed it wet or dry food. Your dog may prefer one over the other, so you can buy food according to your puppy’s preferences. You can also mix wet with dry food.

It’s a good idea to check with your veterinarian to make sure that, especially if you’re mixing wet and dry food together, you’re not feeding your puppy too many calories.

Puppy Treats

It’s hard to resist feeding a puppy treats all the time just for being adorable. But it’s important to not feed a puppy too many treats. Treats are an excellent reward, so you’ll definitely want to have some on hand for training. But keep in mind that the proper ratio of dog food to treats should be 90/10. 90 percent of your puppy’s daily calories should be in its regular dog food. Treats should only make up 10% of your puppy’s diet.

So, try to resist that cute puppy dog face unless you’re rewarding your puppy for a job well done in training!

When to Switch to Adult Dog Food

Smaller breeds can switch to adult food a bit earlier than large breeds, which may take longer to grow into adulthood. Usually, switching to adult dog food happens at about two years old, but because it depends on the breed and your puppy’s size, talk to your veterinarian about the best time to make the switch.

Small kitten sleeping

Feeding a Kitten

When you adopt a kitten from a shelter or a breeder, it’s most likely already old enough that you can start the kitten on regular kitten food immediately. But sometimes that’s not the case. If you’ve adopted a very young kitten that is without a mother, you’ll need to bottle-feed the kitten.

How Much Should I Feed a Kitten?

How much and what you should feed a kitten depends on its age and weight. It’s important to feed the kitten the right food so it can grow into a healthy adult. You want to feed the kitten enough so that it’s getting the nutrients it needs, but you also don’t want to feed it too much, which could cause too much weight gain.

Bottle-Feeding a Kitten

Kittens that are less than eight weeks old will need to be bottle-fed. If you’ve rescued a very young kitten, you’ll need to learn this essential skill until the kitten is old enough for solid food.

Supplies

You’ll need a special bottle from a pet supply store for a kitten. You may have to cut a hold in the bottle’s nipple yourself – make sure it’s just big enough that formula can drip through it. It shouldn’t be flowing out of the bottle.

What to Formula Feed a Kitten

Kittens can’t just drink the milk from your fridge. You’ll need a special kitten formula from a pet supply store. Any other milk could be dangerous for the kitten, even fatal. Kitten formula will have all of the nutrients the kitten needs. Make sure to follow all instructions on the package of kitten formula so you prepare it correctly.

How to Feed a Kitten Formula

First, make sure the kitten is ready to eat by putting a drop of formula on its tongue. If it swallows, then that’s a good sign that it’s ready to eat. If a kitten doesn’t have a stable temperature or isn’t able to swallow, you shouldn’t proceed with feeding it.

To properly bottle-feed a kitten, lay it down on its stomach, never on its back. Make sure to support its head with your non-dominant hand (your dominant hand will be needed to hold the bottle). Be very gentle when you place the bottle into the kitten’s mouth – it should roll its tongue into the shape of a U and then start to swallow, but be patient if your kitten doesn’t get the hang of things right away!

If your kitten is extremely young and the bottle seems too big, you can try using a syringe for feeding at first.

How Much Formula to Feed a Kitten

It’s important to feed your kitten the right amount of its size and weight. The younger the kitten, the smaller and more frequent the feedings.

Kitten’s age and weight Formula (in ml)
0 to 1 week (50 to 150 grams) 2 to 6 ml every 2 hours
1 to 2 weeks (150 to 250 grams) 6 to 10 ml every 2 to 3 hours
2 to 3 weeks (250 to 350 grams) 10 to 14 ml every 3 to 4 hours
3 to 4 weeks (350 to 450 grams) 14 to 18 ml every 4 to 5 hours
4 to 5 weeks (450 to 550 grams) 18 to 22 ml every 5 to 6 hours
5 to 8 weeks (550 to 850 grams) Weaning (every 6 hours)

Kitten Food

Once a kitten is 5 to 8 weeks old, you should be weaning it off of formula and bottle feeding. Five weeks is when the kitten’s premolars come in, which indicates that they’re ready for more solid food. Gradually wean until the kitten is eating entirely solid food.

What to Feed a Kitten

It’s recommended that you feed your kitten specially formulated kitten food until it’s a year old. Kitten food will have all of the extra protein and other vitamins that growing kittens need. Be careful in buying food that says that it is appropriate for both adult cats and kittens. Cats and kittens have very different nutritional needs, so it’s likely that it won’t have enough of what your kitten needs (or too much of what an adult cat needs).

Wet vs. Dry Food

Kittens should be eating a higher proportion of wet food. Their teeth aren’t very strong yet, so they often can’t eat dry food like an adult cat can. You can feed your kitten a mix of the two, but a kitten will require more wet food at first in order to get all of the nutrients that it needs.

Kitten Treats

It’s totally fine to feed your kitten treats, especially if they’re being used to reward the kitten for doing something well, like using the litter box. It’s important, however, to make sure that treats don’t exceed more than 10% of your kitten’s daily caloric intake.

How Much to Feed a Kitten

The amount of food that should be given to a kitten each meal depends on the type of food. Check the packaging for instructions on daily or meal portions. Be careful not to overfeed your kitten – it’s much easier to prevent obesity in the first place than it is to put your cat on a diet later on.
When to Feed a Kitten
Kittens are snackers. They like to eat at least up to four times a day. They also need a lot of calories because they’re growing rapidly – doubling or even tripling in weight. They also have up to triple the energy levels of an adult cat.

If you’re feeding a kitten only wet food, then it’ll need to eat four times a day. If you’re mixing wet food with some dry food, then twice daily may be sufficient. Another option is to free-feed your kitten until it’s between four and six months old, at which point you can switch to scheduled mealtimes.

When to Switch to Adult Cat Food

Unless your kitten is of a larger breed, like a Maine Coon, which reaches maturity at around eighteen months, kittens can generally switch to adult cat food at around a year old. If you’re unsure, consult with your vet to make sure you’re feeding your cat the right food.

Get the Latest in Pet Care News

Check out the blog, updated monthly

Browse the blog

Do Cats Need Heartworm Prevention?

By Heartworms No Comments

Read Time: 6 minutes

What Are Heartworms?

Heartworms are a type of parasitic worm that resembles a thread in appearance. They can infect a variety of animals, although they are most commonly found in dogs. They can grow up to a foot long and live in the heart, lungs, and veins of affected animals. Despite their name, heartworms can cause organ damage in not just the heart, but also the lungs and veins.

Can Cats Get Heartworm?

While heartworm most commonly affects dogs, cats can get heartworm, too. They’re considered atypical hosts and when cats do get heartworm, there are usually fewer worms at once, but there is still a risk to the cats’ health if they get heartworms.

Unlike in dogs, there is no treatment that can kill adult heartworms in cats. Heartworm prevention is therefore essential for the life and health of cats.

How Do Cats Get Heartworm?

Cats get heartworm through mosquito bites. Baby worms are transmitted to the mosquitoes when they bite infected cats or other animals. Heartworms can only live in the mosquitoes for part of their lives and must move to a larger host in order to grow to adults. The mosquito would then bite the cat, which allows the worms to transfer to the cat’s body, where they would, if the cat didn’t get heartworm prevention, grow to adult size and have young of their own.

How Can My Cat Be Tested for Heartworm?

A veterinarian can test your cat for heartworm even when it is still in its early stages. Often times, we can identify heartworm before your cat even shows symptoms.

The test involves taking a small blood sample, which the veterinarian will then test for heartworm proteins. Further testing may be ordered if the vet detects any signs of heartworm. Testing should be done once a year. If your cat is less than six months old, the first test should be after six months of heartworm prevention and then on an annual basis after that.

How Is Heartworm in Cats Treated?

Heartworm in cats is treated by preventing baby heartworms from growing into adults. There isn’t a treatment for heartworms once they have become adults, so it’s important that cats receive the monthly heartworm prevention medicine.

How Does Heartworm Prevention Medicine Work?

Heartworm prevention medicine kills any heartworm larvae that have infected your cat’s body within the last 30 days. A monthly dose of heartworm preventative simply prevents the existing heartworms from reaching adulthood. Heartworm prevention only works on larval heartworms, however, and won’t kill any existing adult heartworms.

How Are Adult Heartworms Treated?

Because cats are atypical hosts for heartworms, if they are allowed to grow to adulthood, there’s no treatment that can kill them. Once a cat has adult heartworms, the only thing vets can do is treat the symptoms, which are usually respiratory in nature and often resemble asthma.

How Much Does Heartworm Prevention Cost?

Depending on the brand and type of preventative, heartworm medication for cats ranges from about $35 to $85. Medications also range from topical to chewable.

When Should I Start Heartworm Prevention for My Cat?

You should start heartworm prevention in your cat as early as 6-8 weeks old. Because your kitten is still growing, the dosage will need to increase as it gets older. Kittens don’t need to have a test first because it can take up to six months for a pet to test positive for heartworms after the initial infection.

What Heartworm Medication Is Best for Cats?

Does My Indoor Cat Need Heartworm Prevention?

Even if your cat is primarily an indoor cat, it should still be on heartworm prevention. No home is completely insulated from the outside. An indoor cat may still spend some time outside, even unintentionally, and mosquitoes can get inside the house.

Do I Need a Prescription for Heartworm Prevention?

Heartworm prevention is usually a prescription issued by your vet. This is so that the vet can first conduct a heartworm test in your pet.

What Are Signs and Symptoms of Heartworm in Cats?

The signs of heartworm in cats vary from subtle to very serious and can include:

  • Coughing
  • Asthma attacks
  • Weight loss
  • Loss of appetite
  • Vomiting
  • Difficulty walking
  • Fainting
  • Seizures
  • Abdominal fluid accumulation

Some will show symptoms right away, while others show no symptoms at all until they collapse and die.

How Dangerous Is Heartworm in Cats?

Heartworm in cats is dangerous because, if not prevented in its early stages, it can be fatal. It can also cause respiratory symptoms that are similar to asthma. Once heartworms have grown to adulthood, there is no treatment that can cure cats.

Does Heartworm Cause Heart Disease in Cats?

Heartworm doesn’t usually cause heart disease or heart failure in cats. Instead, it primarily affects the cat’s respiratory system, causing symptoms such as coughing and difficulty breathing.

Can Heartworm Be Fatal?

Heartworm in cats can be fatal if it is left untreated. Because cats are an atypical host for heartworms and the symptoms are usually respiratory, heartworm can often be misdiagnosed as asthma or other respiratory conditions. There is no treatment for heartworm in cats once the worms have reached the adult stage.

What Other Conditions Are Caused by Heartworm?

Heartworm in cats primarily causes respiratory issues that resemble asthma. Heartworms can cause damage to the cat’s lungs and airways at every stage from larvae to adult. Heartworm can also cause lethargy, weight loss, and loss of appetite. In the worst cases, heartworm can cause death.

How Can I Prevent Heartworm in My Cat?

Especially because heartworm in cats is easily misdiagnosed and there is no treatment for it, it’s vital to prevent heartworm in the first place. You can protect your cat from heartworm by taking your cat to a vet as early as possible for testing and for a prescription for a monthly heartworm preventative medication, even if your cat is exclusively an indoor cat.

Get a Heartworm Prevention Treatment For Your Cat

Our veterinarian can prescribe a heartworm prevention for your cat during their wellness exam.

Contact us

When to Start Heartworm Medicine in Puppies

By Dogs, Heartworms No Comments

Heartworm in dogs can be a very serious disease. In some cases, it can even be fatal. Dogs are natural hosts of the disease, which means that the heartworms that cause the disease can live inside a dog’s body, mature into adults, mate, and have offspring within the dog’s body. A dog could potentially be host to hundreds of heartworms, which can cause damage to the dog’s heart, arteries, and lungs, and can continue to negatively impact a dog’s health even after the worms are gone.

For this reason, heartworm prevention is the best way to treat your dog. The disease is treatable in many cases, but it’s best to prevent it before your dog can get heartworms so you can avoid any lasting health problems.

When Should a Puppy Start Heartworm Medicine?

Heartgard chewable heartworm prevention

According to the American Heartworm Society, puppies should be taking heartworm prevention medication monthly as young as 6-8 weeks old. They are just as prone to getting infected as older dogs, so the prevention must start as soon as possible.

Should All Dogs Get Heartworm Medication?

In Florida, all dogs need to be administered heartworm preventatives regularly. With heartworms being transferred to dogs by mosquitos, Florida is a common place for dogs to contract them. In more northern, cooler areas, it may not be as necessary, but it’s still recommended to protect your dog with preventative heartworm medication. The costs of curing it are significantly more than the cost of preventing it.

Ultimately, giving your dog regular heartworm prevention medication increases the chances of your dog living the long, happy, and healthy life that they deserve.

Does Heartworm Medication Have Side Effects?

Not all heartworm medications use the same ingredients, so different breeds can react to them differently. Speak to your vet about which medicine is best for your dog based on their breed, age, and health.

What Happens If Your Puppy Misses a Dose?

Heartworm prevention medication doesn’t actually prevent your dog from getting infected with heartworms. What it does is kill off heartworms that are in the later larva stages. If you miss a dose, then those larvae have a chance to grow into adult heartworms, at which point the preventative medication will no longer work. In order to avoid the risk of health problems from heartworms, it’s vital that you not miss a dose.

When Should Puppies Be Tested for Heartworms?

It’s not enough to just give your puppy preventative medication for heartworm. It’s also a good idea to get them tested regularly. Usually, your vet will test your puppy for heartworm for the first time between 6 and 10 months old. After that, heartworm tests are usually annual unless you’ve missed giving your puppy a dose of heartworm medication.

What Happens If Your Puppy Gets Heartworms?

Heartworms can start causing damage to your puppy’s body even before the heartworms are fully grown. This means that before they’re detectable, they can still harm your dog. The worms can inflame the vessels in the heart and arteries as well as damage the liver and lungs. Even if you catch heartworms in time to treat them early, they can still cause irreversible damage, lifelong health problems, and even a shortened lifespan.

Need a Heartworm Prevention for Your Dog?

Contact us to schedule an appointment.

Book Your Appointment

Why Do Dogs Lick and Bite Their Paws?

By Dogs No Comments

It’s vitally important for pet owners to know when a behavior is normal and when it’s something to worry about. Dogs self-groom by licking their paws. If your dog is occasionally licking for the purpose of cleaning, then that’s normal and nothing to be concerned about. If your dog is biting their paws or is excessively and intensely licking their paws, then that’s a cause for concern and you may want to consult your veterinarian.

Reasons Your Dog Is Licking and Biting Their Paws

Your Dog Has Food Allergies

If your dog is excessively licking or biting their paws, one possibility is that your dog has food allergies. Food allergies can make your dog’s paws itchy, which can lead them to bite or lick. Talk to your vet about your dog’s food for recommendations on specific food and potential ingredient allergies.

Your Dog Has a Parasite

If your dog has a parasite, such as mange or fleas, their paws may itch, causing them to lick. Check your dog for flea bites and mange spots, which are caused by mites. These parasites are tiny, so even if you don’t see physical evidence of them, it’s a good idea to consult with your veterinarian, who can determine if there’s a parasite involved and recommend any necessary treatment.

Your Dog Has Dermatitis

Dermatitis can affect dogs as well as humans. It’s a skin condition that involves itching. It can be caused by a variety of things, from an allergy to bacteria. If you suspect dermatitis, you can consult with your vet to make sure it’s not caused by bacteria. If your dog frequently licks their paws after coming in from outside, keep a bowl of water near the door so you can wash their paws off when they come inside. Dermatitis in dogs can be caused by allergies to a number of things, including:

  • Food
  • Dust
  • Grass
  • Trees
  • Mold
  • Insects
  • Weeds
  • Lawn treatment chemicals

Just like in humans, dogs’ allergies can be year-round or seasonal, so be on the lookout for behavior changes as the seasons change. Luckily, allergies in dogs are very treatable once the cause is found. Some of the common treatments are:

  • Fish oil (naturally anti-inflammatory)
  • Medicated shampoos
  • Antihistamines
  • Oral antibiotics (for severe cases)

Your Dog Is Injured

Injuries such as bee stings, cuts, torn nails, a blister, a stone or thorn stuck between the pads, or other small injuries can irritate your dog’s paw. If you see that your dog is biting or excessively licking one paw in particular, check to make sure there’s not a small injury-causing irritation. You may be able to treat the injury with basic first aid, but if it doesn’t improve, or if the injury is more serious, you’ll want to take your dog to the vet.

Take special care of your dog’s paws to ensure that they don’t get injured and develop behaviors such as excessive licking and biting of their paws.

  • Clean your dog’s paws after coming in from outside
  • Check their paws for foreign objects
  • Consider dog booties for extremely hot or cold days

Your Dog Has a Health or Behavioral Problem

Licking can also be a sign of a health problem or a behavioral problem like boredom or anxiety. Speak to your veterinarian if you can’t figure out why your dog is excessively licking or biting their paws. Your vet should be able to help you pinpoint what’s going on and if there’s a health or behavioral issue they can advise you on how to manage it.

How to Assess Your Dog’s Condition

The first thing that you should do if you notice your dog licking or biting at their paws is check for visual clues of the cause. Sometimes you can see discoloration or a rash, so you know exactly what is causing the pain or discomfort and can inform your vet about it during your visit.

Check in between their toes and under their paws for any of the following:

  • Punctures
  • Burns
  • Foreign bodies such as ticks or fleas
  • Glass
  • Splinters
  • Bleeding
  • Swelling
  • Redness
  • Odor

Be on the lookout for any other behavior that may be a sign of pain, such as limping or lack of movement.

Is Your Dog Licking and Biting Their Paws?

Contact us to schedule an appointment.

Book Your Appointment

How to Potty Train A Puppy: Your Comprehensive Guide

By Dogs No Comments

From the puppy pads in the house to the leashed walks around the block, puppy potty training is a task that requires a consistent schedule (and quite a bit of patience). This guide will break down everything you need to know to get your puppy trained.

As you read, keep in mind that there are various factors that will affect when your puppy needs to go. If your puppy has an accident out of the blue, consider any changes to the following factors:

Steps for Potty Training Your Puppy

Puppy playing outside
Begin puppy potty training when your pup is 12 to 16 weeks old. This is when your puppy has begun to have more control of their bladder and bowel movements. Teaching a puppy when and where they can go from a young age is important for avoiding behavior problems down the road.

Follow these steps to potty train your puppy:

Step 1: Build a Routine

Getting yourself and your puppy into a routine can make potty training a cinch. Eventually, your pup will pick up on the routine you design. They’ll learn what time you usually wake up and when you normally take breaks to let them out.

Keep in mind, you’ll need to go for more frequent potty breaks while your puppy is young since their bladder can’t handle waiting very long. As they age you’ll be able to go longer without needing to drop everything and take them for a walk.

Here’s a basic potty training schedule to guide your day and prompt you to prompt your puppy it’s time to go out:

When You Wake Up

As soon as you get up in the morning, take the puppy out of their crate and bring them outside to the designated spot. This will start both of your days off on the right paw.

Make sure you’re not hanging around, waiting for the coffee to brew, or getting completely ready for the day first. Throw on some shoes and head for the door as soon as you’re awake to help reduce the chances your puppy has an accident.

Remember, they’ve gone the whole night having to hold it. That’s a long time for a little puppy to wait.

Tip

Go to the same area every single time. Take the same path every single time. This familiarity and routine will help your puppy better understand it’s time to eliminate.

Dog eating from bowl

After Meals

Take your puppy out after every meal. They definitely have something in their system they’ll need to eliminate. Waiting too long after a meal can turn into an accident which will undo all the work you’ve already done.

These after meal potty breaks should be at about the same time each day as your puppy should be on a regular eating schedule.

Tip

Aim to make after meal breaks 5 to 30 minutes after your puppy finishes eating.

When Your Puppy Wakes Up From Naps

Just like when you take your puppy out in the morning, you should take your puppy out when they wake up from naps. You’ll want to take them out as soon as they wake up to reduce the risk they have a sudden accident.

After Playtime

Your puppy may ‘forget’ they need to go while they’re playing. Jumping and running around may also cause them to need to go. Whether your puppy actually ends up needing to eliminate after playtime or not, it’s better to give them the opportunity to go.

Before Leaving Home

When you have a tiny, furry canine to watch out for you’ll need to try and plan your outings around how long they can hold it. Always make sure you take your puppy out before leaving for an extended period of time.

If you’re not sure how long your pup can go without needing a potty break, adhere to the month-plus-one guidelines. This suggests your puppy can hold it for their age in months plus one hour. (Note: Some suggest an hour for every month of age rather than the month-plus-one rule.)

Puppy Potty Training Chart

Age of Puppy Maximum Time Between Potty Breaks
2 Months 3 Hours
3 Months 4 Hours
4 Months 5 Hours
5 Months 6 Hours
6+ Months 6 – 8 Hours

Before Bed

Before you hit the hay, take you and the little pup out for another trip to the outdoor potty to prevent overnight accidents. This will help get your pet in the routine of having a final trip out each night.

Step 2: Set Up a Que

Setting up a queue can teach your dog to let you know if there is ever a time where they need to go ASAP. Most commonly, pets are taught to bark, ring a bell, or sit by the door when they need to go out. Having an obvious queue can help your puppy prevent accidents as you may miss other, less noticeable signs when they need to go out.

Step 3: Take Your Puppy to the Same, Distraction-free Spot Each Time

So you and your puppy made it outside without any accidents. Now what? Your puppy may not quite understand why you’ve rushed them out the door. To help your puppy understand it isn’t playtime, you’ll need to keep a few things in mind:

  • Always take your pup to a secluded area (fewer distractions, higher chance they’ll go potty)
  • Try to stick to the same spot every time you take them out
  • Be boring—don’t play with your puppy or pay attention to them to limit distractions
  • Don’t get frustrated or yell at them in an effort to get them to do what you want

Remember, your puppy may not go every time you take them outside. This isn’t the end of the world. If there’s no success then go back inside and try again later. Eventually, your pup will figure out what the desired routine is.

But, if your puppy does go while you’re outside you want to reward them for their good behavior. This is an even stronger reward with the juxtaposition to your previous, boring pre-potty self.

Step 4: Use of a Crate When You’re Not Home

Beagle in crate
Using a crate while potty training your puppy can be helpful for preventing accidents and can actually control where they go while learning. While everyone would love to stay at home with their pets all the time, for most people it isn’t possible.

Crate training gives your puppy an area that is just for them. This plays into a dog’s natural instinct to keep their space clean. They will avoid having accidents in a crate that is appropriate for their size.

Warning: This is not a magic solution. A puppy’s bladder and bowel control will not defy logic when in a crate, you still need to be home to let them out at appropriate intervals.

Step 5: Properly Reward Your Puppy

Always reward your puppy for eliminating in appropriate areas. This will require you to be prepared to anticipate when your puppy needs to go out.

When your puppy has eliminated, immediately reward them with a small treat (we recommend training treats to avoid giving your puppy too much ‘junk food’). You can also implement clicker training at this point by marking the action with a click followed by a treat.

Time is everything. You should make sure you aren’t giving the reward too soon as this can disrupt and distract from the positive action you’re trying to reinforce. Too late and your puppy just things you’re giving out random treats.

Potty Training Your Puppy When…

You Live in an Apartment

Unless you live on the first floor of an apartment with an easily accessible backyard green space, you’ll be facing extra obstacles when potty training your new puppy. Routines and backup plans are your best friend when you live on Floor 2 and beyond.

Puppy pee pads and doggy litter boxes are a good option when your puppy simply isn’t going to make it. Dog litter boxes are synthetic grass and can be placed on a balcony or in-home like you would a cat litter box. You can DIY this or go with one of the many store-bought variations.

It’s a good idea to carry your puppy in the elevator down instead of letting them wander on the ground. While there’s a chance they will pee on you, they’re much more likely to hold it a bit longer if you’re holding them than if they’re on the ground.
Puppy in playpen

You Don’t Have a Crate

Potty training is pretty much the same with or without a crate while you’re home, it’s when you leave the home that you’ll need to make some decisions. Potty training your pup without a crate is inevitably much easier if you work from home. But when you do leave the house you’ll need to set up the following for your pup while you’re away:

  • Decide on a room or penned off area to contain your puppy while you’re away. (You might need doggy gates for this.)
  • If you decide to use puppy pads, keep them in one spot not spread everywhere.
  • Train your pup to use the puppy pads while you’re gone and be sure to quickly replace any soiled ones.

Tip

Use an enzymatic cleaner that breaks down even the tiniest of potty stains to ensure they do not associate certain spots with pee and thus decide that spot is an okay spot to go.

You Have to Work

If you work long hours potty training can be a bigger hurdle than for those working short shifts or from home offices. Those working full-time often put off adopting a young puppy to avoid potty training struggles. With the following in mind, remember your puppy’s potty training progress will likely be slower when you aren’t able to build a routine and let them outside regularly.

You’ll want to determine if you can come home on lunch breaks to let your puppy out and keep up the potty training schedule. Otherwise, your best bet is to hire a qualified dog sitter. They can either stay with your puppy all day or drop in as a dog walker would for a midday walk.

While you’re at work, set your pup up in a safe puppy-proofed area of the home with puppy pads.

When to Begin Potty Training Your Puppy

A puppy will typically be ready to train when they are between 12 to 16 weeks old. At this point, they have enough bladder control to be trained on when to go out.

Warning: In an effort to avoid parvovirus, you’ll want to make sure your puppies have been given all the necessary shots before letting them wander outside.

How Long Does it Take to Potty Train a Puppy?

On average, it takes roughly four to six months to completely potty train a puppy. As you move into the four and six-month marks, your puppy will be close to completely potty trained but accidents are still likely to occur. To cut down on the time it takes to have your puppy completely potty trained, avoid punishing your puppy for accidents, and use positive reinforcement when they eliminate in the designated area.

How to Potty Train Your Puppy Fast

If you’re trying to potty train fast you’ll need to be available to let your pup out every hour of the day. If you have the right schedule and a puppy who’s an especially quick learner, potty training can be accomplished in seven to fourteen days. We want to stress, however, that this is not the norm.

Don’t go into potty training expecting a quick solution. The best way to speed up potty training is with positive reinforcement. Incorporate frequent potty breaks and stay with your pup at all times to monitor for signals they need to go out.

Frequently Asked Questions

Can an eight-week-old puppy be potty trained?

Eight weeks is still a bit too young to realistically potty train your pup. At best they can hold their bladder for two to three hours. At eight weeks you can do your part to get them where they need to be to go—don’t expect them to notify you they need to go out. You can begin establishing routines for yourself and, as your puppy ages, they will begin to pick up on the potty schedule.

What is the hardest dog breed to potty train?

You can’t make generalizations set in stone when it comes to dog breeds. But, most dogs of a specific breed will have similar temperaments. Because of this, the hardest dog breeds to potty train are usually Jack Russell Terriers and Yorkshire Terriers.

It comes as no surprise that these ‘harder to train dogs’ are also smaller dog breeds. Small and toy dog breeds are known for being a bit trickier to potty train. This is often attributed to their smaller size and faster metabolism.

Signs Your Puppy Needs to Eliminate

Dog asking to go out
As your puppy begins to associate outside with the right place to eliminate they will find ways to signal to you if you haven’t already taught them to us a bell or bark at the door. Watch out for the following common signs your puppy needs to be let out:

  • Circling and whining
  • Sniffing and licking their groin or rear
  • Scratching or sniffing at the door
  • Returning to a spot in the house where they previously eliminated

Tip

It’s better not to wait until you notice obvious signs your pup needs to go out, especially when you’ve just started potty training. Take your pup out at regular intervals to avoid the possibility of accidents.

How to Deal With Accidents

Dealing with accidents starts and ends with not punishing your puppy for their mistake. No, rubbing their nose in urine isn’t going to magically potty train them even if you’re frustrated.

If you catch your puppy in the act of having an accident in the house, make a sudden noise to distract them (not yelling at them). This should momentarily get them focused away from having an accident and give you time to swoop in a get them outside. Once they eliminate outside reward with a treat.

Be sure to thoroughly clean the area after an accident to remove any urine scent. You’ll need a cleaner stronger than your traditional surface cleaner to completely remove the smell.

Do’s and Don’ts of Potty Training Puppies

If you’re a first-time puppy owner and in charge of potty training, here are some do’s and don’ts you should follow:

  • DO reinforce positive behavior as this shows the puppy when they are doing the right thing.
  • DON’T punish them by rubbing their nose in accidents, this is cruel and they do not understand it.
  • DO recognize that accidents happen and there might be medical reasons for them.
  • DON’T neglect your puppy and think they have a bladder of steel—no one does.
  • DO give them the time they need to learn and always act with patience and kindness.

There is no set amount of time that it takes for a puppy to be potty trained. Give them the time and patience that they deserve and you’ll be in for a lifetime of happy licks and tail wags.

Essential Potty Training Tools

Raising a puppy is full of surprises (many of them monetary) and potty training is no exception. Before you bring a puppy home, consider the following tools you’ll need to buy and the price tag that comes with it:

Potty Training Supplies

Product Price
Leash & collar $8 – $20
Dog crate $25 – $100
Playpen $30 – $100
Baby gates $20 – $30/pack
Training treats $3 – $8/bag
Poop bags $6 – $10/pack
Pooper scooper $10 – $20
Cleaning products $8 – $16/ea.
TOTAL $130 – $354

While you can certainly find cheaper (or pricier!) alternatives, you can usually expect to pay between $130 and $354 for supplies when you get started with potty training your pup.

Potty Training Older Dogs

Senior beagle dog on a walk
Your new four-legged friend isn’t a puppy and also isn’t potty trained. Now what?

Don’t fear, potty training older dogs is much easier than potty training a young pup. Whether your dog has never lived indoors, the previous owner never bothered to train them, or they have always used paper or concrete in a pen, we’ll run you through the ropes of bringing you senior dog up to speed on potty training.

Just like with puppies, your senior dog needs a firm routine. This includes going out at specific times and having meals at regular hours.

Avoid free-feeding as you won’t be able to monitor when your dog likely needs to go. When you do take your adult dog out you’ll want to stay with them or keep them on a leash. This lets you monitor if they’ve actually eliminated.

Some dogs may have never gone on grass or dirt if their lives were spent on concrete. If you’re having a particularly difficult time teaching a dog to eliminate in the grass, you can have a friend’s dog or a dog park help you out. Your dog is more likely to go in a spot where another dog has gone.

Remember not to get frustrated. Your dog only wants to please you and may have developed habits due to previous neglect or abuse.

Warning Signs to Watch Out For

Even after your dog is a pro at knowing when and where to go, you should keep an eye on their urine and stool. It may seem gross, but as a pet owner it can actually help you monitor your pet’s health.

Noticing continuous diarrhea, blood when urinating or defecating, and other warning signs can help you catch problems before they progress to more severe and obvious symptoms.

Keep an eye out for:

  • Increased amount of urine
  • Increased frequency in elimination
  • Blood in either urine or stool
  • Change in consistency of stool
  • Straining
  • Discoloration of urine or stool

The changes in your dog’s elimination could be caused by anything from separation anxiety to Cushing’s disease. Certain medications your pet is on can also affect their elimination (which will likely be addressed upon prescription).

If you notice unusual or alarming changes it’s best to contact your veterinarian immediately. Your vet will be able to conduct a urinalysis, CBC, fecal sample analysis, or any other necessary testing to determine the root cause.

If you’re concerned about behaviors to symptoms your puppy is exhibiting give us a call to schedule an appointment. It’s always better to check the symptoms early on rather than wait until problems worsen.

Get the Latest in Pet Industry News

Check out the blog, updated monthly

Browse the blog

COVID-19 and Your Pets: What You Need to Know

By Dogs No Comments

Updated 3/23/2020

COVID-19 is a disease caused by a new coronavirus, SARS-CoV-2, that has not previously been identified. This virus is not the same coronavirus that can cause the common cold in humans, nor is it the same as canine coronavirus (CCoV). Coronaviruses are a family of viruses characterized by crown-like spikes on their surface as seen under the microscope.

There are many viruses in this family that cause various types of diseases, such as diarrhea and upper respiratory infections.

Can my pet be affected by COVID-19?

At this time, there is no evidence that any animal or pet can infect humans with the new coronavirus. Additionally, no animals to date have been reported to be sick with COVID-19.

“At this time, there is no evidence that any animal or pet can infect humans with the new coronavirus.”

Can my dog be affected by COVID-19?

Technician holding dog's head
As of March 23, 2020 – There has been a report from Hong Kong authorities that a quarantined dog tested “weak positive” for the virus. The dog’s owner had tested positive for COVID-19 as well. At this time authorities think this is not a cause for alarm as the dog showed no signs of sickness. The dog eventually tested negative. The positive result may be due to environmental contamination from the infected owner. In other words, the virus may have been present in the dog’s nose the same way the virus was likely present on other surfaces in the household.

It is important to note that the test used is very sensitive and can detect very small fragments of the virus. It does not indicate that the virus was intact or contagious.

On March 19, 2020 the Agriculture, Fisheries and Conservation Department of Hong Kong reported a second dog testing positive for the COVID-10 virus. This dog was also in the home of an infected owner. The other dog in the residence tested negative. Both dogs showed no signs of illness.

Can my cat be affected by COVID-19?

To date, there has been no testing in cats, though it is likely that cats have been exposed through infected owners.

Can other animals be affected by COVID-19?

COVID-19 has not been reported in farm animals, such as horses, donkeys, goats, and other kinds of livestock.

Because this is a new virus and information is still being collected, as a precaution, restrict contact with your pets if you are diagnosed with COVID-19. If this is not possible, practice good hygiene and wash your hands before and after touching your pet, avoid close contact, and wear a facemask.

How is it transmitted?

Current evidence suggests that person-to-person spread is the main source of infection. This occurs through respiratory droplets created when an infected person sneezes or coughs. There is also a possibility of spread via objects or surfaces that have been exposed to the virus; however, this is not suspected as a main source of infection.

Should I monitor my pet for any signs?

Nurse looking off into distance in concern

Because there have not been any documented cases of pets becoming sick with COVID-19, there are no specific recommendations. However, there is still much to learn about this new virus, and vigilance is key. If your pet exhibits signs of illness (coughing, sneezing, fever, abnormally low energy, etc.), particularly if your pet has been exposed to someone known to be infected with COVID-19, call your veterinarian for guidance.

Is there a vaccine?

Currently, a vaccine for this new SARS-CoV-2 coronavirus is not available. There is a vaccine for the canine coronavirus (CCoV), however, this vaccine does not work to protect you or your pet from COVID-19.

Other points to note about COVID-19

According to the American Veterinary Medical Association, there is no evidence of spread between animals and there is no indication pets can become sick with the COVID-19 virus.

If you have, or display symptoms of COVID-19, limit contact with animals until further information has been gathered. If nobody else in your household can handle the care of your pet, you should avoid sharing food, kissing, or hugging your pet. As always, practice proper hygiene during all interactions with your pet.

What should you do if your pet needs veterinary care?

If your pet needs veterinary care, call ahead to your pet’s veterinary or emergency clinic to learn how their procedures have changed. Many veterinary clinics now offer drive-up services and telemedicine options. At the very least, your veterinarian will likely require you to call upon arrival and a technician may escort your pet to their exam room from your vehicle.

Contact us to schedule an appointment if your pet needs veterinary care.

Does your pet need veterinary care?

CONTACT US